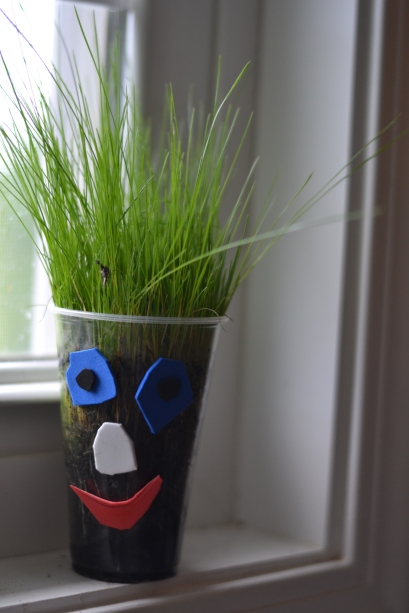
Last year, when I was teaching, and BroBro was in Preschool he made an ‘egg head’. I must admit, I thought it was one of the cutest crafts I had seen.

So when a group of us homeschool moms got together for our monthly craft and playdate last month with the theme of spring in mind, I had a dilemma. When I think of spring, I think of flowers and petals but those crafts just weren’t going to do it with this group. This group is largely made up of boys ranging in age from 4-7 with a tag-along 2-year old girl on one end and an 8-year old girl on the other. No, the pretty stuff just wasn’t going to work so I had to find something cute enough for the girls but cool enough for the boys. What better idea than the grasshead?
I wanted the project to be hands on and the grasshead was a great way to do that but a few things needed to be changed. Our quick, to-the-point active boys probably didn’t have the carefulness needed to handle the delicate egg. And while they would be able to draw the faces without any difficulty, I did want them to spend more than 2 seconds on their activity.
So I did what I always do when I need an idea and searched the internet. I loved how Red Ted Art’s Blog used the pantyhose and created theirs with big goggly eyes and a pinched out nose. But this time around, I figured that just might take too much patience for our group of boys. I also loved how SALSA PIE used a pot and drew on a face. This seemed simple enough. I just might try that one at home but it would be a bit pricey to buy pots for all the kids in the group.
I then came across the idea of using a cup.

I also liked what I saw at The Teacher Wife. She used clear cups and printable face pieces.
This seemed to be the easiest way to accomplish a fun and successful grass head. I decided to use the clear cups which turned out to be a fantastic idea. BroBro found it fascinating to watch the sprouts of grass as they took root and began to make their way to the top of the cup. I also choose to use foam with sticky backing to make the faces. This made it easier for those small boy hands to cut out the faces they wanted and easily stick them to the cup. If they messed up, they simply drew and cut another face part and placed it on the cup. When the project was completed the kids were so excited to water their heads and couldn’t wait to see the hair begin to grow. It only took about a 10 days for our heads to spout a full head of hair.
A complete description of how we completed the project is listed below.
What do you think? As cute as the egg? I think so! I just think BroBro’s is in need of a serious haircut!
Cup Grass Heads
Materials:
* clear plastic cup – we used 9 oz but 5 oz would work great too.
* potting soil
* grass sead
* craft foam with sticky back
Steps:
1. Cut out the pieces for your face and stick them on the cup.
2. Fill cup 3/4 full of dirt
3. Layer with a generous amount of grass seed
4. Top with soil
5. Water and watch your grasshead grow.
Notes: There is no drainage when the cups are set up this way so be careful about watering your head too much.


Our grass heads are thriving and very loved. They get a haircut every few days. So it’s the craft that keeps on going. 🙂
I love that! So much fun!
love love love your blog!
Ahh, Thank you! And I have enjoyed keeping up with all of your chicken happenings. 🙂